How to make your own fish fertilizer:
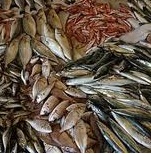
1. The first step is to buy fish from reasonable supplier. For that purpose normallya any kind of fish will work. In fact, you might as well use trash fish, or fish discards like fish heads, guts, etc. I like to use whole fishes though as I think that makes for a better product.
2. Second is to throw the fish into a blender to mash it up into little pieces. I cut my fish into 8ths or so and then chuck it into my kitchen blender but I’m a bit of a caveman. If you’re squeamish, buy a separate blender for this, just make sure it is powerful enough, mine is 500W and works fine for small-medium size fishes. Remember, the finer the fish bits, the more effective the fermentation.
3. Than add water. You can use a simple guide of 3:1-3 parts water to 1 part ferment material. 1 roughly 8in tilapia comes to about 500mL when ground up, so I add about 1500mL water. ALWAYS USE NON-CHLORINATED WATER. Chlorine kills microbes. Simply let your chlorinated tap water sit for several hours, allowing the chlorine to dissipate. I let it sit overnight generally.
4. If you are using a blender, blend up the mixture. The water helps keep it loose so it blends much better after you add the water.
5. Than add lacto bacilli to blended fish mixture. I use 2tbsp per L. You can use more or less if you want. 2tbsp/L is plenty though. See our lactobacillus recipe for proper preparation and dilution of your lacto serum.
6. Later add 1/3 parts sugar. This should be 1/3 the amount of fish you’ve added. Sugar will be either molasses or normal cane sugar. Try not to use cane sugar since it is chemically bleached. Raw(unrefined) sugar like muscovado is best. In the Philippines we use molasses because it is cheap, but any glucose source works – syrup, honey, etc. Just use whatever is cheap. Glucose gives microbes energy. Whatever you have access to cheaply, go for it.
7. If using sugar, the equivalency is about 1KG sugar = 1L solution. So if you have 500mL like my tilapia, you want 1/3 of that in sugar. You’d use about 167g sugar, or roughly ¾ cup. The recomended is to blend the whole mixture up a bit. It’s good to have it as fine as possible. Up to you how much you blend it, I blend until I don’t hear so many bones crunching in the blades of the blender.
8. Now you have liquefied fish, sugar, and lacto. Pour this mixture into a container. Loosely cover the container. No need to seal, because the container will explode as CO2 is released by fermentation. You just want to make sure other things don’t get into it. I use a container with a lid and loosely screw the cap on top (just make sure you don’t seal it because it WILL explode).
9. The process takes anywhere from 3 weeks to over a month. How do you know its finished? By the smell.
10. You know when it’s done when there is no smell anymore. During fermentation there is a nasty smell, but once completed, there will be almost no odor. You can open it, and put your nose right up to it. Take a whiff. Nothing but a faint vinegar smell. Now you know its done. Congratulations! You’ve made your own Fish Hydrolysate!
11. Now, usually I transfer it to a smaller container, usually just a smaller water bottle, just for convenience. At this time, I use a strainer and a funnel to strain the bones and scales out of the hydrolysate. But don’t expect a lot. From a whole 8-10in tilapia, you will only get a little tiny pile of bones/scales. They will feel kind of rubbery, not brittle. Throw these in the compost pile or garden, they are excellent fertilizer and microbe food, already inoculated with microbes!
12. Leave the cap on the strained concoction loose until you see no more little bubbles forming. Then cap it and store it for use as your own natural fertilizer.
Adapted by,
M Anem,
Senior Agronomist,
Taman Cendana, Bandar Melaka,
Melaka, Malaysia.
(30 April 2016)
No comments:
Post a Comment